What is the difference between a scissor cut and a razor cut?
A scissor cut removes only length but not weight. A razor cut removes length and weight. If you cut the same style on the same head of hair using a razor or scissors, you will get two different looks.
Many of the styles today require that a hair stylist choose between using scissors or a razor. A straight-down and smoother look requires that the weight of the hair be maintained and, since gravity pulls weight downward, scissors are the best option. I should also add that with scissors, cuts are more precise. If you want any movement outward and upward, then removing as much of the weight as possible is required and a razor cut is highly recommended.
When you are thinning out, or texturizing as it’s more commonly called, the stylist has more control over taking out the weight from the hair using a razor as opposed to thinning shears. If you have long bangs in the front of your face then thinning them out with a razor allows you to maintain the length so they are more inclined to stay off your face.
One of the down-sides of razor cutting is that hair will develop split ends sooner. The reason for this is you are cutting the hair off against the cuticle of the hair shaft. This isn’t a major challenge as the ends can be smoothed and disguised with a finishing product.
Some people may be concerned that a razor cut on fine hair may take out too much weight and make the hair appear even thinner. One of the new techniques that hair stylists have found is that taking very short strokes with the razor can not only duplicate a scissor cut as far as keeping a lot of the weight in the hair but will also achieve a soft blending of the lines that only a razor cut can give.
Why is it so difficult to get consistent blond hair colour on my long hair?
This can be a real challenge with clients who have dyed and/or bleached their hair in the past, especially when different products have been used over time. The ends of the hair may have been dyed or bleached numerous times and will react differently to highlighting than hair at the roots that has never been treated at all.
To begin, I will ask what your hair colour history is, looking for
- previous dye colours,
- previous highlights,
- previous use of “box colours” (retail hair colouring products), and
- how long ago each of these was applied.
Enzymes, peroxide, or ammonia are present in every colour, even semi-permanent dyes. Box colours contain components of red and yellow. The effects of all of these will fade out but remain in the hair to some degree so they need to be factored in. In the end, I’ll have a “map” of your past hair colours.
The first step is to apply an overall solid base colour. Before this, however, a filler may be applied to porous sections of the hair, such as previously lightened hair or hair that has faded on the ends. This will equalize the porosity of the hair along the entire shaft, allowing the new colour to be absorbed more evenly and last longer without fading.
To achieve a uniform blonding, I customize a lightening agent suitable for each section of hair that has been coloured in the past. After isolating the strands of hair to be highlighted, different strengths of lightener are applied along the length of the hair shaft. A weaker strength of lightening is applied to lighter coloured hair or hair that hasn’t been treated before. Hair that has been dyed in a dark colour or that has been dyed repeatedly needs a stronger lightening agent. The objective is to end up with highlights that are the same colour from root to tip.
Red tones used in past hair colouring are the hardest to eliminate and sometimes it is best not to try. If the overall hair colour has red tones, the highlights will blend in better. In cases where the client wants the red eliminated, I apply heat to the section in which red dye was used to accelerate the lightening action.
Gold tones are much easier to eliminate than reds. A heat application may be required to achieve the desired lightening.
The easiest shades to lighten are dark blond to light brown. The lightening agent alone is sufficient to highlight the hair to an ash blond shade without the use of heat.
How can I add volume to my fine hair?
First, let’s define what we mean by fine hair. With fine hair, the diameter of the hair shaft is smaller than it is with normal or coarse hair. Fine hair often has a very smooth cuticle (outer covering) that makes hair shiny. Some people may substitute the word ‘thin’ for ‘fine’ but we define thin hair as low-density growth; that is, fewer hairs on the scalp per square inch.
The Haircut
One-length blunt cuts were invented for fine hair. To update this look, use a minimum of layering on the top of the head only.
Some consideration should be given to the choice of razor versus scissors for cutting fine hair.
- A razor used on fuller, fine hair will remove some of the excess weight that can flatten the hair.
- A scissor cut on thinner, fine hair will make the hairstyle appear fuller.
Hair Styling
If you blow-dry using your fingers instead of a brush, you will be better able to tell when your hair is completely dry. If you stop before your hair is dry, it will collapse after five or ten minutes.
Bending over when drying healthy hair adds volume. This is not recommended for hair that has fuzzy, flyaway hairs on top because these have a tendency to stick out after the hair is dry. On longer hair, use a diffuser to dry the roots first and then the ends.
For dramatic results, apply a small amount of hairspray on the ends of 100% dry hair and wrap your hair in six or seven large Velcro rollers for 10-15 minutes or until the hairspray has dried. Make sure the rollers are tightly wound so the base of the hair is lifted straight up from the scalp. When dry, remove the rollers and use your fingers to arrange your hairstyle, as a brush will flatten the hair too much.
Hair Care Products
Clean hair appears fuller since the hair’s natural oils don’t weigh it down.
- As a rule of thumb, any products used on the hair should have a light consistency so you can achieve maximum volume.
- Use products that don’t add much weight to the hair.
- Avoid combination shampoo/conditioner products.
- Light, clear shampoos will rinse off more completely than those that are thick and creamy.
- If you must use a conditioner, apply it only to the ends of the hair.
- Gels should be used only on the roots to provide lift and volume.
Rub finishing products on the roots instead of the ends to achieve lift.
Aveda has a line of hair care products called Pure AbundanceTM that contain traces of Kaolin clay and increases the diameter of the hair shaft by 17%. Pure AbundanceTM Hair Potion is wildly popular with our clients. It comes in powder form and is sprinkled on the hair and worked in with the fingers. The powder momentarily liquefies and then adheres to the hair, creating lift, volume and texture. For maximum lift, apply to the roots of dry hair. It can also be used all over the hair before setting or blow-drying.
What is the difference between lip glaze and lip shine?
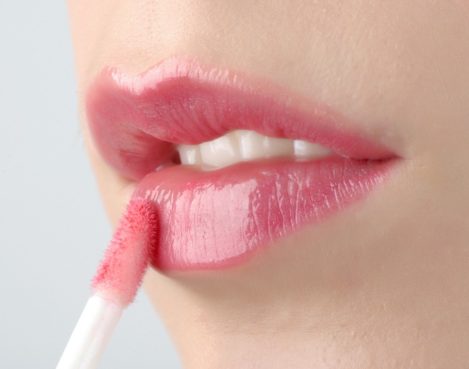
Lip glaze is a semi-translucent satin gloss that you apply over your lipstick to enhance its colour. When manufacturers introduce new seasonal lipstick colours, they generally also bring out lip glazes that are complementary in colour to their lipsticks. Because lip glaze is thicker in texture than lip shine and has colour in it, you may use it without lipstick.
Lip shine, on the other hand, is a very translucent wet gloss. Without lipstick underneath it, it only makes your lips look wet because it has little or no colour pigmentation in it.
If your lips tend to be dry (particularly in our winters), remember that these two products are not moisturizers for dry lips. They are more for shine and a wet look. Because of their sheerness, they usually do not have any sun block in them to protect your lips when you go outside.
Almost all of the makeup companies sell a form of lip glaze and lip shine. In some cases companies may even call the same product different names. After all, we know that a great deal of marketing success is based on the name of a product although the smell and taste of the product will ultimately determine its success. This is why fruit and plant smells and tastes have enjoyed the top spot with both lip glaze and lip shine.
Without messing up all my makeup, how can I get rid of the powder eye shadow that has fallen on my face during application?
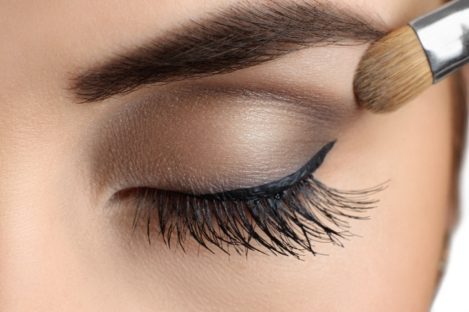
Ever since Marilyn Monroe made blue eye shadow popular during the 40s and 50s, the problem of eye shadow fall-out has been a challenge. If you try and brush it away with your powder brush, you will end up making it look streaky and you may have to take off your foundation and blush from the cheek area and start over.
A trick that makeup artists use is to add a powder guard before applying eye shadow. To do this, take loose translucent powder and a large powder brush. (Or, if you can find a powder puff, that works even better.) Put a large deposit of powder on the brush or puff and heavily powder the tops of your cheeks, under the eyes, and on the bridge of your nose. It may look strange but after you put on your eye shadow and you see the debris from your eye shadow laying on top of the powder, all you have to do is flick the powder off with a large powder brush and “voila” – no eye shadow debris.
By doing the powder-guard trick you end up with subtle highlights in those areas that you powdered. It’s actually quite a thrill, going from bad-looking to good-looking in two seconds and right before your eyes. It always makes me smile when I do this trick on a makeup client.
A word of caution, though: be sure to get the application order right. The order of makeup application is:
- concealer
- foundation
- blush
- powder guard
- eye colour
- remove powder guard
- mascara
Once you powder, the powder sets whatever is under it so if you have not put on your foundation and blush first, you will have a difficult time putting them on because they both will drag (due to the powder setting) and you can’t blend them as well. At this point I like to put on the lipstick because I get a real wow effect when I brush off the powder but you may want to brush the powder guard off, then apply lipstick.
A parting note about Marilyn Monroe. Did you know that she was the first fashion icon to wear primary colours and not monochromatic colours? She had red lipstick, blue eye shadow and yellow blonde hair.
Why do some lipsticks come off more quickly than others?
There is no one answer for everybody. Knowing the variables will help you choose the one that is right for you. Keeping this knowledge in mind when you are purchasing a lipstick will go far in helping with this challenge.
The weather and the time of year are one factor. In the wintertime your lips are drier and they may be absorbing the moisture out of your lipstick, leaving the colour pigment on top to be easily licked or peeled off. During this time of year you may want to go with a lip tint which has more moisture in it and less colour pigment so you can reapply it more often and not get a colour pigment build-up, especially at the corner of the lips.
Aveda has a collection of seven different shades of lip tint. These cost less than their lipsticks and they have an SPF of 15. In the spring lipstick collections, which are usually released around March, you might try one of the new lighter shades of lipstick. If you were to put one of the complementing shades of lip glaze (or gloss) over top of it that will help in keeping the colour pigment in place longer.
The surest way to keep lipstick on at any time of year is to fill in the lips with a lip pencil that is the closest colour to your lipstick. Pencils are more waxy and will not come off as quickly as your lipstick. Then put on your lipstick, blot, and reapply. If the lipstick colour gets licked off there will still be some colour on your lips.
The next point to consider is price difference. Keep in mind the manufacturers play to the demographics. Younger people who need to experiment until their fashion sense is developed tend to go to the drug stores for inexpensive lipsticks and if the staying power is not good then that’s okay. The middle group is willing to pay a bit more in price but is not preoccupied with staying power because they use lip gloss and lip shine, tinted lip balms, etc. However, mature consumers are concerned about staying power because they have fine lines that make their lipstick run so they are willing to go to a higher-end lipstick. The staying power of these higher-end lipsticks is quite remarkable. They stay on for a full eight hours but, I have to admit, I was surprised when I heard there was a $38.00 tube of lipstick available!
What lipstick should I use for large lips? What about thin lips?
Large Lips
When it comes to the application of colouring for the lips, I think women who have full lips become aware at a very early age the difference between daytime and nighttime lip colours. Daylight is the strongest light of all and can make lipstick colour look too bright and, therefore, make the lips look even fuller. During the daylight hours, I would recommend using a moist, light, neutral lipstick and if the lipstick is not moist enough, then follow with a lip shine. I think daylight reflecting off the moist lips makes the lips look more attractive.
Artificial lighting in the evening is much weaker than daylight and so your choices of colour for full lips can be bolder. To add a more professional evening wear look to your makeup, try applying a lip liner that is a shade darker than your lipstick around the inside edge of your lips then fill in the rest of your lips with your lip colour. Try blotting your lips with a tissue, then reapplying your lip colour. Blotting after the first application will remove a lot of the oils but leave some of the colour pigment still on the lips so not only will your colour be deeper but it will also have staying power.
Thin Lips
For thin lips I strongly recommend a lip pencil in a shade as close as possible to your lipstick. With a mirror in front of you, push down on the skin between your nose and top lip. The edge of the lip will protrude out. With a sharpened lip pencil apply the lip liner right up to the very outer edge of the lip. You could even extend it just a hair’s width above the lip line. Do this for both the top and bottom lips. I like to then fill in the entire top and bottom lips with lip liner because on thin lips, if your lipstick comes off, your outer edge liner will show up right away versus fuller lips where your chances of the lip colour coming off on the entire lip is less.
When working with thin lips, I recommend using the lip liner as your primary colour over all of the top and bottom lip and then using a lip gloss or shine to enhance the colour. The idea is that if the lip gloss or shine accidentally extends over the lip line, it’s not as noticeable.
How can I stop my lips from chapping?

Chapped lips are usually a good indicator that your body is dehydrated. It’s important to know how many cups of water you need each day based on your body weight.
The formula you can use to find out is take your body weight and divide by 2. This gives you the number of ounces of water you should drink daily. Divide this number by 8 to convert this to 8-ounce cups of water. The answer usually surprises people but that is how much water a day you need. Also, for every cup of coffee or tea you drink, add 2 more cups of water. Keeping hydrated during the summertime is even more important because we lose a lot of our body moisture at that time.
Another form of chapped lips might actually be sunburn and the lips are peeling. Remember that your lips are constantly up front and exposed when in the sun. Wearing a lip balm or a lip moisturizer at all times is so important. Aveda has one called Lip Saver. It has an SPF of 15. Keep in mind that women who wear a lip colourant of some kind rarely get dry or chapped lips. The colour pigment offers some protection from the sun and the waxes and oils topically moisturize the lips.
A helpful hint I can also offer is to gently brush the lips with a baby’s toothbrush for a soft exfoliation. It removes dry, dead skin cells and makes the lips look healthy.
What can I do to cover dark circles under my eyes?
Heredity is usually the main cause of dark circles under your eyes. Just like many of our hair, skin, and eye colour features, a predisposition for dark circles is inherited. Transparency of the skin around the eye area is also inherited and can make dark circles appear more dramatic.
Exposure to the sun can heighten the appearance of dark circles under the eyes. Sunlight darkens the skin by raising melanin levels and bringing melanin to the surface of the skin which, in turn, makes the dark circles appear even darker. Fatigue or illness can make your skin look pale which makes your dark circles even more noticeable.
The most common way to deal with dark circles is to first apply a concealer to the dark area. Because concealers have a heavy concentration of colour pigmentation in them, you only want to apply them to areas that foundation alone won’t cover. Concealers come in a variety of colours. Try to get one that matches your skin tone and preferably in a golden tone because it counteracts purplish circles and ends up looking more natural.
When applying concealer under the eye area, some people like to use their fingers. I find this method can sometimes look cakey, especially on thin, mature skin. I like putting some concealer on the side of a Q-tip and gently rolling the Q-tip back and forth a number of times over the dark area. Try to blend the concealer out seamlessly and invisibly to the surrounding area. You can finish the look by applying foundation over top of the concealer and blending over the entire face. If you want to powder over your face to get more of a matte finish, put your blush on first then powder. Remember, once you put powder on to set the foundation, if you apply blush, it will drag down and look messy.
I should mention at this point that the secret to successful makeup application is blending. Nothing does this as well as a good set of brushes. Investing in a set of makeup brushes will not only help you do a better job of blending, it will also put a lot of enjoyment into the makeup experience. Plus, you will feel alike a makeup artist every time you apply your makeup. What a way to start a day!
What are some of the ingredients that are found in makeup?
The cosmetic industry is worldwide and I think we get so used to seeing their products and never really find out what ingredients are in them. In recommended order of application, here is a list of some of the ingredients in makeup.
First, there’s foundation. They can be in liquid or powder form. They usually contain mineral oil and if in liquid form are generally referred to as oil-based or water-based.
Eye shadows also come in powder or cream form and if in cream form are usually water-based as opposed to oil-based. They can also have in them a certain amount of oil, petrolatum, which is a by-product of petroleum, thickener, wax, perfume, preservatives and colour added. Water-resistant shadows have a solvent base such as mineral spirits. Dry and pressed eye shadows are composed much the same as powdered blush or cheek colour.
Eyeliner pencils consist of wax paraffin or a hardened oil-based petrolatum and a variety of additives to create colour.
Next is mascara. It’s a product that includes water, wax and thickeners in its formulation. The pigment in mascara must be inert (unable to combine with other elements) and usually are carbon black, carmine, ultramarine, chromium oxide, and iron oxides. Some wand mascaras contain rayon or nylon fibres to lengthen and thicken the hair fibres.
Powder cheek colour, or blush as it is more commonly called, is simply a pressed loose powder with colour added.
Lip colour is available in a variety of forms which are all formulas of oils, waxes and dyes. Castor oil is the primary ingredient in lipstick; other oils used are olive, mineral, sesame, cocoa butter, petroleum, lecithin, and hydrogenated vegetable oils.
Finally, there is face powder which consists of a powder base mixed with a colouring agent (pigment) and perfume. Ingredients in most powders include talc, zinc oxide, titanium dioxide, kaolin, chalk, zinc stearate, and magnesium stearate. Bactericides are also added to inhibit the growth of bacteria and preserve the product.
Do I really need to use a sunblock all the time?

I would highly recommend it but you can decide for yourself after reading the following information about the sun’s ultraviolet rays, their effect on the skin, and ways that you can protect yourself.
Ultraviolet Rays
The sun emits ultraviolet (UV) radiation in the form of UVA and UVB rays. (UVC rays are also emitted but they don’t penetrate the earth’s ozone layer.)
- UVA rays are also called the “aging rays”. They contribute 90%-95% of the UV rays that reach the earth’s surface. These rays weaken the skin’s collagen and elastic fibers, causing wrinkles and sagging in the tissues.
- UVB rays, also referred to as the “burning rays”, cause tanning or burning of the skin. They don’t penetrate the skin as deeply as UVA rays and they contribute to the body’s synthesis of Vitamin D and other important minerals.
- Exposure to both UVA and UVB rays can lead to skin cancer.
Sun Protection Factor (SPF)
Many products today contain ingredients that protect the skin from UV exposure by absorbing or reflecting UV rays. A unit of measurement called the Sun Protection Factor (SPF) expresses the strength of protection. SPF indicates how much longer you can stay in the sun without burning compared with using no protection. For example, SPF 15 allows you to stay out 15 times longer and SPF 30 allows for 30 times longer.
Sunscreens and sunblocks both protect against UV exposure. Sunscreens work by absorbing UV rays while sunblocks reflect them. Some sunblocks contain zinc oxide and titanium oxide that may leave a whitish residue on your skin because the particles are larger. Shop around for a product that’s right for your needs.
One product doesn’t fit all. For a day at the beach, your sunscreen (or sunblock) should be heavier and greasier than your lighter daily moisturizer with SPF. Read the labels and choose a broad-spectrum product that protects against both UVA and UVB rays. It’s essential to liberally apply the product to all exposed areas, including toes and ears.
Other Facts About the Sun and Your Skin
- Avoid exposure, if possible, between 10:00 a.m. and 3:00 p.m. when the sun’s rays are the strongest.
- Darker skin types are more prone to having issues with dark spots (hyper-pigmentation) from exposure to the sun.
- The average person gets 18 hours a week of sunshine just walking between buildings and the car, going to and from work, walking the dog, etc.
- Ninety percent of the sun’s UV rays can penetrate light cloud layers.
- Fresh snow can reflect 80% of UV light.
What is rosacea and how do I treat it?
Rosacea (pronounced “rose-AY-shah”) is a progressive skin disease that usually begins with redness like a blush appearing on the face, most often on the cheeks, nose, chin or forehead. At first, the redness may come and go but over time it can become more persistent and visible blood vessels may appear. If left untreated, bumps and pimples may appear. Because of the combination of redness and pimples, some people may call rosacea “adult acne”. However, most common acne treatments don’t work on rosacea; in fact, they can make the condition worse.
In some rare cases of rosacea, the nose may become swollen and lumpy. This is called rhinophyma (pronounced “ry-no-FY-muh”). Rosacea develops slowly and may gradually worsen over time. Most of the people who get rosacea are 30-50 years old, have fair skin, and are of Irish, Scottish, English, or of Eastern or Northern European descent. Rosacea is rarely seen in men or women of Asian or African heritage.
What Aggravates Rosacea?
- Weather
Sun, heat, humidity, cold and wind can all trigger a rosacea flare-up.
- Food and Drink
- Hot soup and drinks such as coffee or tea
- Alcohol, especially red wines
- Chocolate, vanilla, soy sauce and vinegar
- Certain vegetables such as eggplant, tomato, spinach, lima and navy beans, peas
- Certain fruits such as avocadoes, bananas, red plums, raisin figs, and citrus fruits
- Hot spices
- Meats such as liver
- Intense Exercise
Exercise is an important part of a healthy lifestyle but it can cause rosacea to flare up.
- Stress
Emotional stress is an important trigger for people with rosacea
- Medical Conditions
Some underlying health conditions can stimulate a flushing response and trigger rosacea flare-ups. For example:- Hot flashes associated with menopause
- Fever, coughs, and colds
- Temperature-Related
- Saunas
- Hot baths
- Overheating
- Overly warm environments
A footnote about the sufferers of rosacea: the bulbous nose and red face has always been thought of as a sign of a heavy alcohol drinker. While consumption of alcohol may aggravate the disease, the symptoms can be just as severe in someone who doesn’t drink.
Can Rosacea Be Cured?
Unfortunately, there is no cure for rosacea at present; however, simple treatment can control rosacea and improve the appearance of the skin. Treatment may stop the progression of the disease and in some cases reverse the progress. The important thing in treating rosacea is to seek medical care early and follow the physician’s treatment program exactly.
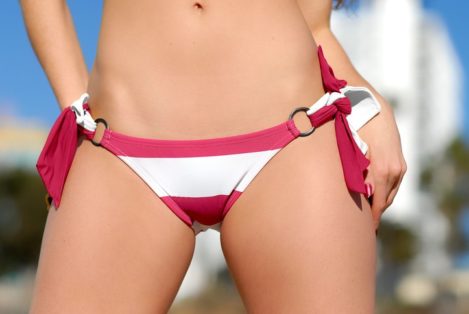
What’s the difference between Brazilian and bikini waxing?

With a bikini wax, hair is removed from all areas below the panty line (including the inner thigh area) and the area above the top of the panty. With a Brazilian wax, all hair is removed from the front, back, and bottom of the genital and rectal areas.
The Waxing Process
A skin primer (to sanitize the skin) and talcum powder (to dry the area) are applied prior to the wax application. Then Aveda’s soft formula plant wax is applied to the skin and a waxing strip is placed on top of the wax to ensure complete hair removal.
Wax is applied to very small sections at a time. The skin in this area of a woman’s body is highly sensitive and waxing small areas allows for easier removal and minimizes the discomfort for the client.
A facial moisturizer designed for sensitive skin is applied after waxing. This helps reduce any redness and it soothes and moisturizes the skin.
Home Care & Maintenance
We advise clients to wash the waxed area using cool water only and to apply moisturizer at home on a daily basis. Exfoliating three times a week helps prevent ingrown hairs. We recommend using Aveda’s Soothing Aqua Therapy sea salts for exfoliating at home.
Typically, waxing can be repeated in three to four weeks’ time but it depends on an individual’s hair growth rate. There should be at least 1/4″ of hair growth for the wax to adhere to.
Waxing vs. Shaving
- Shaving leads to ingrown hairs more frequently than waxing.
- Regrowth of shaved hair is uncomfortable because the tips of the hairs are sharp as opposed to waxed hair where the tips are soft and rounded.
- Shaving is required very frequently as opposed to waxing where the time between wax treatments can be up to three or four weeks.
Waxing vs. Depilatories
- With depilatories, hair is not removed to the same depth as it is with waxing so hair grows back sooner and the treatment needs to be repeated more often.
- The chemicals in depilatories can be very harsh and irritating when used on sensitive skin.
Other Waxing Benefits
- Regrown hairs are softer, finer, and lighter in colour.
- Over time, waxing may result in permanent hair removal.
Where did the term Brazilian waxing originate?
Brazilian waxing was first introduced to the Western world in 1994 at the J. Sisters International Salon in Manhattan, NY. This salon is run by seven Brazilian sisters who learned their craft in a family-run salon in Vitoria, Brazil. They said that waxing is an important grooming ritual in the Brazilian culture due to the popularity of small bikinis so the sisters decided to take a chance in offering a more extreme version of the bikini wax that they called the Brazilian bikini wax.
There are two variations of the Brazilian wax. In the first version, almost all hair is removed from the genital and anal area except for a thin strip of hair (the “landing strip”) on the pubis. In the full Brazilian version, all hair is removed.
Brazilian waxing has become wildly popular, particularly with celebrities, earning the full Brazilian wax an alternative nickname of the Hollywood wax.